Mini vMac is a amulator designed for make using macintosh on pc possible. If you want to try this amulator, you can download from ‘https://www.gryphel.com/c/minivmac/’. You can experience the macintosh on Pc with this amulator. How to get started with Mini vMac, how to build Mini vMac from the source, how to compile the Mini vMac extras, and translations of the user interface are the points we will talk about. If you want to experience this amulator, they will be helpfull in our opinion.
How to get started with Mini vMac is the firt point you need to know for using this amulator. First, if you have not already done so, download a standard variation, choosing the appropriate version of Mini vMac for your operating system. If your web browser doesn’t automatically expand it, do so manually. Next you will need a ROM image file from a Macintosh Plus. This file should be named “vMac.ROM”. A utility such as “CopyRoms” can be used to obtain this file from your Macintosh Plus. Next, you will need a bootable disk image for the Macintosh Plus.
You can download the two System 6.0.8 install disks from Apple: “SSW_6.0.8-1.4MB_Disk1of2.sea.bin” and “SSW_6.0.8-1.4MB_Disk2of2.sea.bin”. Use any modern version of the program Stuffit Expander to get the disk image “System Startup” from “SSW_6.0.8-1.4MB_Disk1of2.sea.bin”. Move the “vMac.ROM” file into the same folder as the Mini vMac application you have just downloaded. Now launch Mini vMac. The Macintosh and Windows versions can be launched by double clicking on the application’s icon.
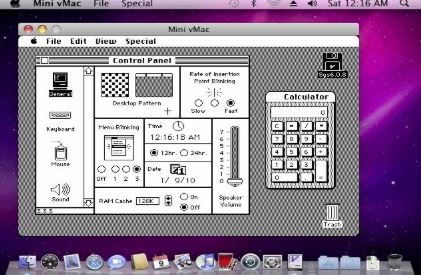
In Linux you can use the command line to set the current directory to the folder containing the application, and then issue the command: “./minivmac”.Mini vMac should open a window, filled with a gray pattern, with a picture of a floppy disk in the center, with a blinking question mark on it: blinking question mark. Drag the icon of your bootable disk image, “System Startup”, onto the Mini vMac window. The emulated computer should boot from this image, starting up the Finder, with a menu bar at the top of the emulated screen: System 6. When you’re done looking at this, choose the “Shut Down” command from the “Special” menu on the emulated screen: Then click on the close box of the Mini vMac window to quit the application.
Second point we will talk about is how to build Mini vMac from the source. First download the source code archive from the download page, a file with the name like “minivmac-3x.xx.src.tgz”. Extract from this file to get a folder. The source for the configuration tool is in “setup”folder. In a unix like system, such as Linux on x86-64, it can be compiled using something like “gcc setup/tool.c -o setup_t”, then run with something like “./setup_t -t lx64 > setup.sh”, and the output run with “. setup.sh”, and then Mini vMac can be compiled with “make”.
Next point is how to compile Macintosh 680×0 applications belonging to the Gryphel Project, including many of the Mini vMac extras. Each of these applications is released as a disk image, all of them in the same format. At the top level of the image is the compiled application and a folder named “source”. The source folder contains a file named “app.c”, and also other files, with names ending in “.i”, that are used by “app.c”. All of the source code is written in the C language, except for the Macintosh style “resources”.
The resources are contained only in the compiled application, there is no other original copy in the disk image. Compiler Index: MPW using Symantec C compiler, MPW using MPW C compiler, Metrowerks C/C++ 68K 1.1, Symantec C++ 6.0, MPW using Symantec C compiler. The Symantec C compiler is included in the Macintosh Programmer’s Workshop 3.5 Golden Master that is still available from Apple.To compile the Mini vMac build system, mount its disk image, and then execute these commands: Set TheApp MnvM_bld:
SC -opt space -proto strict -w 17 -b2 -mbg off “{TheApp}:source:app.c” -o “{TheApp}:app.o”
Link -rn “{TheApp}:app.o” “{Libraries}Interface.o” “{Libraries}MacRuntime.o” -o “{TheApp}:{TheApp}”
Delete “{TheApp}:app.o”
To compile other applications, replace ‘MnvM_bld’ in the first line. To execute commands in MPW, enter them into the Worksheet, select them, and then press the “Enter” key. The compile is done when the cursor stops spinning. MPW 3.5 requires a Macintosh II or later. The Mini vMac Macintosh II emulation in development works well enough to run this version of MPW. MPW using MPW C compiler. The MPW C compiler is included in MPW 3.0 (other versions might or might not also work).To compile the Mini vMac build system, mount its disk image, and then execute these commands: Set TheApp MnvM_bld
C -r -b2 -mbg off “{TheApp}:source:app.c” -i “{TheApp}:source:” -o “{TheApp}:app.o”
Link -rn “{TheApp}:app.o” “{clibraries}CRuntime.o” “{clibraries}CInterface.o” “{libraries}Interface.o” -o “{TheApp}:{TheApp}”
Delete “{TheApp}:app.o”
To compile other applications, replace ‘MnvM_bld’ in the first line.
Last point we will axplain about this amulator is translations of the user interface. Mini vMac can use other languages besides English for the user interface, as a compile time option (-lang). For each language there is one file that defines the strings used. Here are the current versions: English, French (Pierre Lemieux, Gaël Coupé), Italian (Fabio Concas, Gianluca Abbiati), German (Detlef Kahner), Dutch (Luc Pauwels), Spanish (Chir), Polish (Przemysław Buczkowski), Brazilian Portuguese (Mauricio), Catalan (ArduinoXino), Czech (Anonymous), Serbian Latin (SerbXenomorph). (These pages are actually the result of an automatic conversion. The original source code uses an encoding scheme for the non ascii characters.) It wouldn’t be too hard to add a couple more characters if needed for other languages. Languages that use a completely different character set might eventually be possible, as long as less than 128 characters are needed. Languages that use thousands of characters are not feasible with the current implementation.
In sum you can use macintosh with Mini vMac on pc. Now here it is you need to know for experince this amulator. If you want to experience this amulator, you will know everything you need to know about it.